Save PNG with Transparent background in Affinity Photo
I've been using Affinity Photo a lot recently to create images for the web.
Coming from a Photoshop background, I am accustomed to images automatically having a transparent background when I export them in the .png format. Unfortunately this doesn’t appear to "currently" be the case in Affinity Photo.
When you export a .png image in affinity photo, like the image below where the full scope isn't colored, the default behaviour seems to be for the background to be coloured white when you export the image.

We need a way to tell Affinity Photo that the background shouldn't be filled in when exporting. It should just be left transparent if the image format (.png) supports transparancy.
Exporting Current / Open Images
If you want to export an image you already have open with a transparent background, follow these steps. Otherwise skip to the section below titled "Preparing New Image" to prepare a new image for a transparent background.
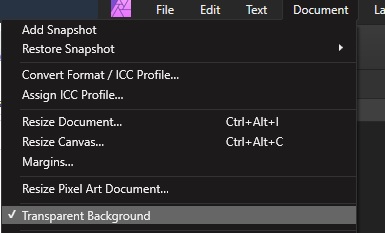
Click on Document > Transparent Background. And that's it!

Your image will now have a transparent background if you export it into a .png format.
Preparing New Image
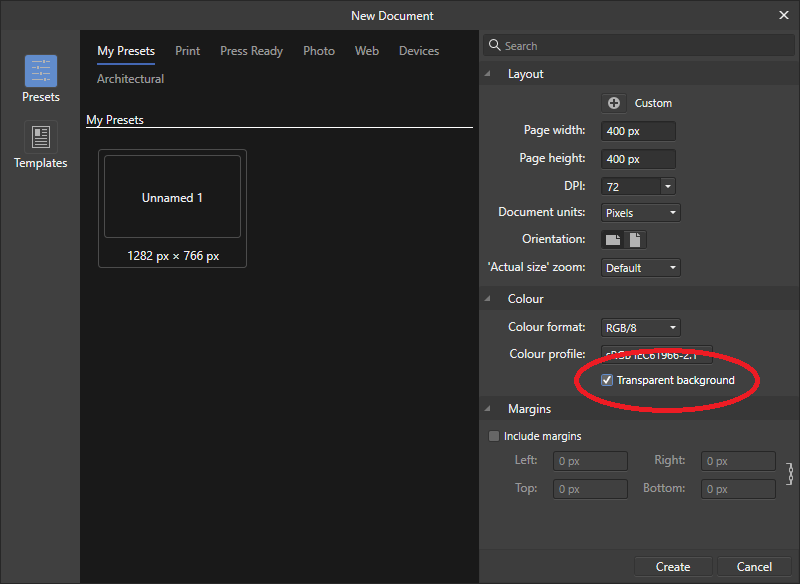
If you're looking to a create a new image that has a transparent background and wait to avoid the previous steps. Specify that the image should have a transparent background when you create it by selecting: File > New. Now at the New Document screen you'll see the option to enable Transparent Background.

Tick the option to enable transparent background. The setting will be saved in your document's .afphoto file, so if you open it again then it will still export with the background transparent.
Exporting in Affinity Photo
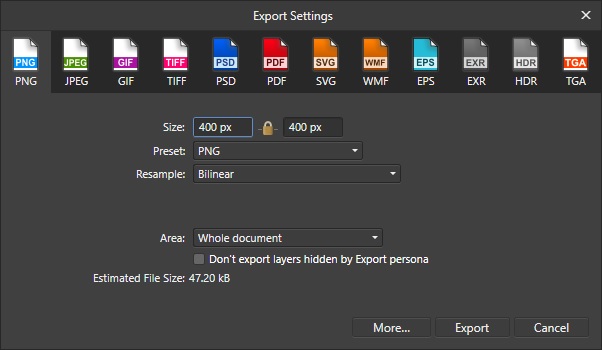
Remember that you can't save a .png file in Affinity by selecting File > Save because that's how we save our project. You need to select the option for File > Export and then you will see something like the screen below.
