How to switch from Photoshop to Affinity Photo: The Guide
After a change of circumstances, I recently made the decision to drop Adobe Photoshop. I cannot justify the yearly cost for Photoshop when I'm only using it relatively simple edits 4-5 times a month.
This blog details my switch to Affinity Photo, also my opinions for why you could switch too.

Note: This blog is aimed at intermediate & beginner level users. I'm can't claim to be a professional designer or editor.
Quick Links
Affinity Introduction
We all know what Photoshop is, however a large part of the industry is still unaware of Affinity Photo's benefits.
Affinity Photo is more than just an alternative to Photoshop, it's a feature packed raster graphics editor in its own right.

Available for both Windows, MacOS and iOS, Affinity Photo is a multi-platform solution that receives regular updates and new features.
Luckily, I already had some experience with Affinity Photo before the switch. A few years back, a client asked me to edit an image which they forwarded to me in the Affinity Photo format. I installed the trial and made the small adjustments. Super easy!
Why Switch
Here's some of the reasons why I chose to switch from Photoshop to Affinity Photo.
Cost
Here's the big one. I was paying around £120 per year to use Photoshop. It wasn't a big deal when I was using it on a daily basis, but it's not really cost effective when you're only using it a couple of times per month.
Affinity Photo is available for less than £60 as a one-time purchase. For that you receive updates and I believe the licence (not a lawyer so please double check this) allows you to have it installed on two PC's at any time. So if you throw away a PC or reinstall the OS then you can keep on installing it on your current PC or Mac. Providing you don't have it installed on more than two computers at one time. This is useful for always having a copy on your PC and laptop.
That is a massive cost saving in the first year alone and a real reason to support this alternative to the Adobe giant.
Workflow
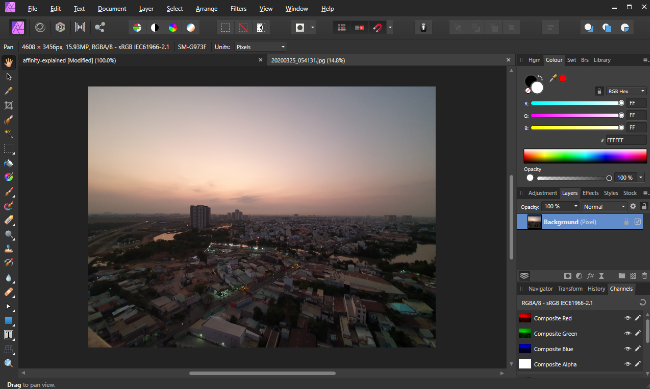
The interface in Affinity Photo is different to Photoshop's, however it shouldn't take more than two or three days to adjust. You'll find that some of the hotkeys are slightly different, but Affinity Photo seems to more closely follow industry standards.
The main difference you'll find is that Affinity Photo splits the interface into area's called personas. The impact is that you're only shown features as you use them and when you need them. This may be a bigger benefit to beginner and novice users who might struggle
Features
My research tells me that Affinity Photo is missing some features of photoshop including smart objects, artistic filter effects, text on a path and puppet warp. If you're not using these features at your level, then it's not really going to impact you. If you are using advanced features on a regular basis then it's likely that you can justify the cost of the market leading solution unless you can find an alternative in Affinity Photo. I would like to see smart objects in Affinity Photo however i've managed to use the workarounds without issue.
File Formats
Affinity Photo is compatible with Photoshop's PSD format, however any new projects should be saved in Affinity's .afphoto format.
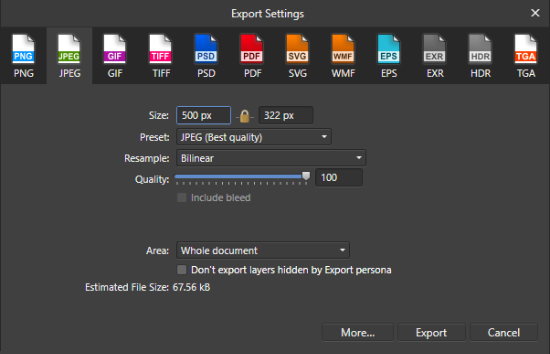
You can export projects in all common formats including png, jpg, gif, tiff, psd, pdf, svg, wmf, eps, exr, hdr and tga.

Still not sure about the switch?
Affinity Photo might not be the right choice if you're an advanced user who can justify the cost. If your workflow involves features like text on a path or artistic filter effects then it might be worth sticking with photoshop for the time being. If you're unsure then give the trial version a go!