Generate AWS S3 Presigned Keys in C# For jQuery Frontend
Most of the guides describing how to upload files to S3 from a JavaScript frontend assume that the developer is using a modern library or framework such as React, Vue or Angular.
I was recently given the task to add file-upload-to-S3 capabilities into a jQuery frontend running on an ASP.NET 5 backend. Yes, many jQuery websites are still getting updates in 2020, and jQuery is far from dead yet, and many of us are still supporting old sites.
So, this guide will detail the steps that I took to create and configure the S3 bucket, generate keys from the backend, and then upload files from the jQuery frontend.
At the time of writing, these instructions are good for ASP.NET Core 2 & 3, in addition to the new ASP.NET 5. It's also worth noting that we're also using the latest jQuery 3.5.1.
It's actually surprisingly easy to develop the solution with this stack, with very few gotchas. The full code can be found at the Github link at the bottom of the post.
What Are Presigned URL's ?
Depending on business requirements, we might not want to upload files to S3 from our own server. Instead, we might want the user to upload files directly to S3 from their browser.
The problem is that we do not want to leave our bucket open with full write access to the internet, because it's a massive security risk. Instead, we just want to create a URL that the browser can forward new files to. We call this a presigned URL. It's generated by the S3 API and we can set an expiry datetime, and also configure allowed MIME types to restrict the kinds of files that can be uploaded.
Presigned URL's come with a few benefits, the main ones being that files can be sent directly to S3, instead of wasting bandwidth and compute resources on our server. Your website might be behind a service such as Cloudflare which restricts file upload files, in which case presigned URL's would be a workaround. Essentially, we're cutting out the middle man.
Creating the Bucket
Login to the AWS console or use the API etc, to create an S3 bucket with the name of your choice. You need to remember the exact name because this will be needed later.

Configuring Bucket for CORS
We are going to upload files from our frontend, and therefore we need to set the appropriate CORS policy.
CORS stands for Cross-Origin Resource Sharing, and it's a security feature implemented by the browser. For the purpose of this tutorial, we have a fairly open CORS policy, however you may want to implement a stricter configuration in a production environment.
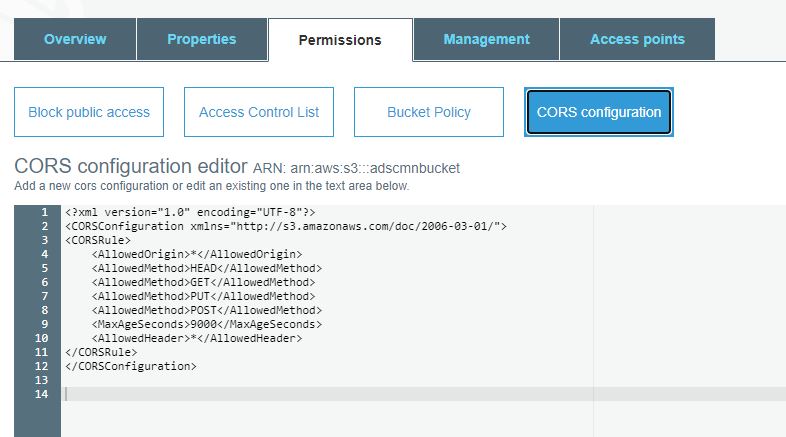
You can do this from the AWS console by opening your bucket and going into Permissions > CORS configuration.
Here is the code I used for testing. This will allow you to upload from localhost and any other origin on the internet.
<?xml version="1.0" encoding="UTF-8"?>
<CORSConfiguration xmlns="http://s3.amazonaws.com/doc/2006-03-01/">
<CORSRule>
    <AllowedOrigin>*</AllowedOrigin>
    <AllowedMethod>HEAD</AllowedMethod>
    <AllowedMethod>GET</AllowedMethod>
    <AllowedMethod>PUT</AllowedMethod>
    <AllowedMethod>POST</AllowedMethod>
    <MaxAgeSeconds>9000</MaxAgeSeconds>
    <AllowedHeader>*</AllowedHeader>
</CORSRule>
</CORSConfiguration>
IAM permissions
In this tutorial, to generate the presigned S3 URL, we're using an access key and secret to authenticate with the AWS API. If you don't already have these credentials, then we need to create them. Don't worry if you've never done this before, just follow the below steps. If you've already got the access key and secret, then skip these steps.
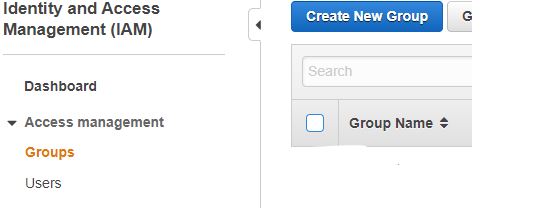
From the AWS console. search for IAM and open Identity and Access Management (IAM). Then click on the groups area and then Create New Group.
Now set an appropriate name for the group, I'm calling mine "s3-test" for this tutorial.
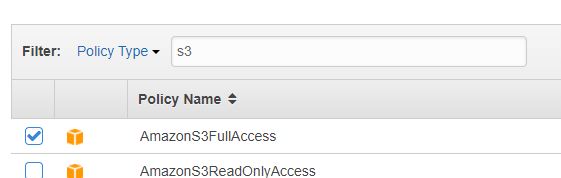
After continuing to the next screen, you can now assign a policy to the group. By assigning a policy, anything using this group will have full access to read and write to S3 buckets inside your account. Search for the group named "AmazonS3FullAccess", tick the box and then continue to the next screen.
At the confirmation screen, click the Create Group button.

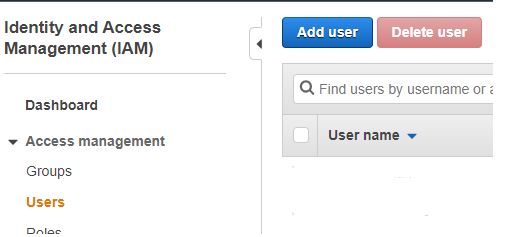
We now need to create a user for the group, so click on the users area and then click on Add user.
Give your new user a meaningful name, i'm calling mine "s3-test-user" for the purpose of this tutorial.
And here's the important part. Make sure that you tick the option for Programmatic access. By ticking this option, we will be provided with an access key ID and secret access key when the new user is created. These two things essentially act like our username and password when authenticating with the AWS S3 API.

Next at the permissions screen, make sure that you add the user to the group that we created earlier. This will give the user full read/write access to buckets behind the S3 API.
You can then continue to the review stage and click on the button to Create User.

Congratulations, you should now see the access key ID and secret access key. Make sure that you keep these safe and secret, since AWS won't show them to you again. Remember that if anybody else see's these details, they can access your S3 buckets. So don't commit them to a public repository, instead you should use some kind of secret store, however these particulars are outside the scope of this tutorial.

The ASP.NET Core 3 Backend
We can finally start coding our solution.
Our backend will generate the presigned keys with the AWS S3 SDK. Once a presigned key has been generated, it will be forwarded to the jQuery frontend. Our frontend will then use the key to upload files directly to S3 without going via the server.
Nuget packages
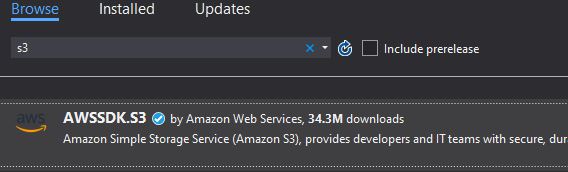
Start by downloading the correct Nuget packages. I'm using Visual Studio 2019 so I open up the Nuget package manager and install AWSSDK.S3. This package makes it very easy to work with the S3 API.
Controller Code
Add the following code to your controller, I've added mine to HomeController in the example repository. By adding this code, we create a HTTP endpoint that accepts a string value as an input, which we use as the file name.
        public IActionResult GeneratePresignedUrl(string fileName)
        {
            DateTime expiryTime = DateTime.Now.AddMinutes(120);

            S3 s3 = new S3();

            string url = s3.GeneratePreSignedVideoURL(fileName, expiryTime);
            if (string.IsNullOrWhiteSpace(url))
                return StatusCode(500);

            var result = new GenerateFilenameResult
            {
                PresignedUrl = url,
                FileName = fileName
            };

            return Json(JsonConvert.SerializeObject(result));
        }
The code in our controller calls our S3 class which handles the call to S3 via the AWS SDK, which generates the presigned URL for us.
Remember to set the correct bucket name, access key, secret key and to update the region endpoint if you use a region different to "RegionEndpoint.APNortheast1".
    public class S3
    {
        private AmazonS3Client _s3Client;
        private readonly string _BucketName = "";
        private readonly string _accessKey = "";
        private readonly string _secretKey = "";

        public S3()
        {
            _BucketName = "";
            _accessKey = "";
            _secretKey = "";
            _s3Client = new AmazonS3Client(_accessKey, _secretKey, RegionEndpoint.APNortheast1);
        }

        public string GeneratePreSignedVideoURL(string key, DateTime expiryTime)
        {
            string urlString = "";

            // check extension is valid
            string mimeType = FileLogic.CalculateMimeType(key);
            if (string.IsNullOrWhiteSpace(mimeType))
                return null;

            GetPreSignedUrlRequest request1 = new GetPreSignedUrlRequest
            {
                BucketName = _BucketName,
                Key = key,
                Expires = expiryTime,
                ContentType = mimeType,
                Verb = HttpVerb.PUT,
                Protocol = Protocol.HTTPS
            };
            urlString = _s3Client.GetPreSignedURL(request1);

            return urlString;
        }
    }
That's the toughest part of the backend. We also have some helper methods for handling the checking of MIME types.
Our backend never touches the files, remember that the files are sent directly to S3 from the frontend. And therefore it cannot directly query the file for a MIME type.
But remember that we do have the file name, and therefore we can implement some helper methods to figure the MIME type on the backend based on the file's extension that we received from our endpoint.
    public class FileLogic
    {
        public static string CalculateMimeType(string extension)
        {
            var mimetypes = GetAcceptedMimetypes();

            extension = Path.GetExtension(extension);

            var matchedMimeType = mimetypes
                .Where(m => m.Extension.ToLower() == extension.ToLower())
                .FirstOrDefault();

            if (matchedMimeType != null)
            {
                return matchedMimeType.Mimetype;
            }
            else
            {
                return null;
            }
        }

        public static List<Models.AcceptedMimetypes> GetAcceptedMimetypes()
        {
            List<Models.AcceptedMimetypes> mimetypes = new List<Models.AcceptedMimetypes>();

            mimetypes.Add(new Models.AcceptedMimetypes
            {
                Extension = ".mp4",
                Mimetype = "video/mp4"
            });

            mimetypes.Add(new Models.AcceptedMimetypes
            {
                Extension = ".webm",
                Mimetype = "video/webm"
            });

            mimetypes.Add(new Models.AcceptedMimetypes
            {
                Extension = ".mkv",
                Mimetype = "video/x-matroska"
            });

            return mimetypes;
        }
    }
And here are the model classes that you'll need to store somewhere.
    public class GeneratePresignedUrlResult
    {
        public string PresignedUrl { get; set; }
        public string FileName { get; set; }
    }

    public class AcceptedMimetypes
    {
        public string Extension { get; set; }
        public string Mimetype { get; set; }
    }
And that's our backend fully coded. Remember to check the Github repo for a full example if you have any problems with the code.
Building the Frontend
Now that we have our backend, it's time to code the frontend. Here is my cshtml file with the file input, button and an area to show the upload progress.
@{
    ViewData["Title"] = "Home Page";
}

<input type="hidden" id="ResultPresignedS3Url" />
<input type="hidden" id="ResultFilename" />

<div class="container">
    <div class="row">
        <div class="col-12 col-md-6 offset-md-3">
            <div class="custom-file">
                <p id="presignedUrlToDisplay"></p>
                <input type="file" class="custom-file-input" id="inputFile" name="AdVideo" accept=".mp4,.mkv,.webm">
                <label class="custom-file-label" for="AdVideo" id="inputFileLabel" data-english="Choose file">Chọn tệp</label>
            </div>
        </div>
        <div class="col-12 col-md-6 offset-md-3" id="progressNumberArea" >
            <div><span data-english="Uploading: ">Uploading: </span><span id="progressNumber"></span></div>
        </div>

        <div class="col-12 col-md-6 offset-md-3 mt-4">
            <button id="saveVideoButton" type="button" class="btn btn-primary" data-english="Save Video" disabled>Save Video</button>
        </div>
    </div>
</div>
And here is our JavaScript / jQuery code that handles the call to the endpoint to generate the presigned URL, and the code that handles the upload of the file directly to our new URL.
$('#inputFile').on('change', function (evt) {
    // get the file name
    var fileName = document.getElementById("inputFile").files[0].name;
    // replace the "Choose a file" label
    $(this).next('#inputFileLabel').html(fileName);


    // Generate presigned url
    $.ajax('home/GeneratePresignedUrl', {
        data: { "fileName": fileName },  // data to submit
        type: 'POST',
        dataType: 'json',
        success: function (data, status, xhr) {
            if (data !== null) {
                // Parse data from string to json
                data = $.parseJSON(data);
                $('#ResultPresignedS3Url').val(data.PresignedUrl);
                $('#presignedUrlToDisplay').innerText = data.PresignedUrl;
                $('#ResultFilename').val(data.FileName);
                // if presigned url generated okay then show the save button
                $('#saveVideoButton').removeAttr("disabled");
            }
        },
        error: function (jqXhr, textStatus, errorMessage) {
            alert("Error generating filename");
        }
    });

});

// helper functions for upload handler
function UploadProgress(evt) {
    if (evt.lengthComputable) {
        var percentComplete = Math.round(evt.loaded * 100 / evt.total);
        document.getElementById('progressNumber').innerHTML = percentComplete.toString() + '%';
    }
    else {
        document.getElementById('progressNumber').innerHTML = 'unable to compute';
    }
}

$("#saveVideoButton").click(function () {
    // upload handler
    function uploadFile() {
        var file = document.getElementById('inputFile').files[0];
        var contentType = file.type;
        var presignedUrl = $('#ResultPresignedS3Url').val()

        $.ajax({
            type: 'PUT',
            url: presignedUrl,
            // Content type must much with the parameter you signed your URL with
            contentType: contentType,
            // this flag is important, if not set, it will try to send data as a form
            processData: false,
            // the actual file is sent
            data: file,
            success: function (data, status, xhr) {
                alert("Upload success");
            },
            error: function (error) {
                alert('File NOT uploaded' + error);
            },
            // Monitoring of progress
            xhr: function () {
                var xhr = new window.XMLHttpRequest();
                xhr.upload.addEventListener("progress", function (evt) {
                    if (evt.lengthComputable) {
                        UploadProgress(evt);
                        //Do something with upload progress here
                    }
                }, false);
                return xhr;
            },
        });
    }
    // When button pressed
    uploadFile();
});
That should be everything that you need for the frontend.
Complete Example
A full stack example can be found in the following Github repository. The readme file explains how to launch the application.
https://github.com/AndyPresto/S3-Presigned-Keys-jQuery
Final Thoughts
I hope that this guide has been useful to you.
Obviously jQuery is a dying technology and most new projects are not going to be built using it. But if you're managing an older project, and like me, you need to migrate file uploads to S3 then this is a great solution.
As always, feel free to submit a PR to the repository if you feel that it can be improved in any way.